
By: Brynden Hutmacher, Systems Engineer and Chris Saso, SVP of Technology
We are following up on our post: What happened to my HP Firmware Download Access and wanted to share some tips on how you can access your HP Support. To make it even easier to link your support agreements to your company, we asked one of our “Smart guys” to sit down and walk you through the process in this blog post. We hope you find this useful and if you have further questions or need support please reach out to us.
![]() Creating a HP Passport account and linking Warranties, CarePacks and Support Agreements write up:
Creating a HP Passport account and linking Warranties, CarePacks and Support Agreements write up:
To enable access to OS and firmware downloads you will first have to create a HP Passport account and link your Warranties, CarePacks and Support Agreements to it. To do this go to the HP Support Center and click on the “Register for HP Passport” link. (see below)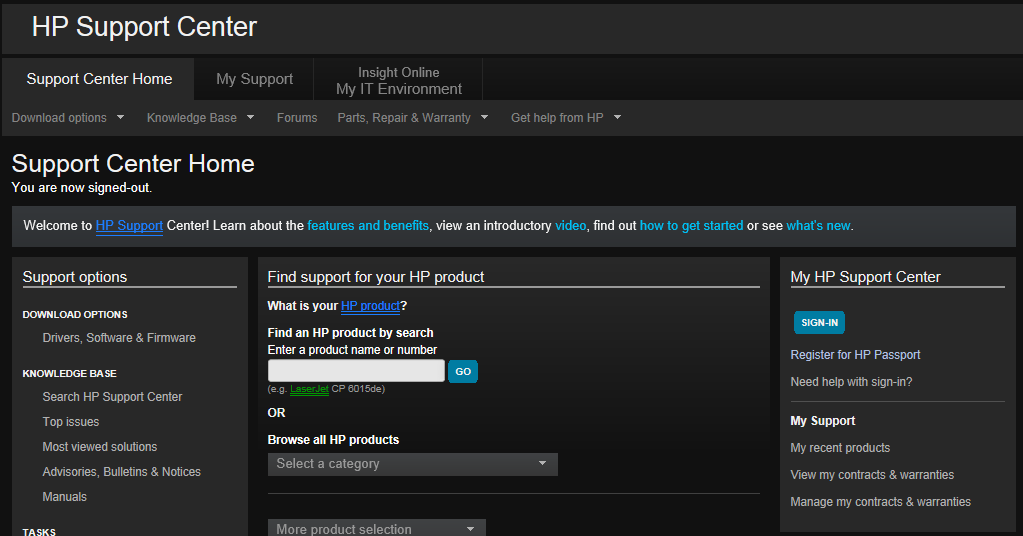
Creating an account will take no more than 5 minutes, as it just asks for very standard account information. Once you have an account you can then either link your companies Warranties, CarePacks and Support Agreements or, if they are already linked to an existing account(s) within your company you can be added to them quite easily. Click on the “Manage my contracts & warranties” link on the right side of the page (see above). The link will open the following page that will allow you to link all of your Warranties, CarePacks and Support Agreements, view your currently linked warranties, manage warranty shares, transfer ownership of any warranties and remove currently linked warranties.
To start this process you will want to select “yes” at the top of the screen if you will be linked to any existing warranty shares, or will be linking others. The process of linking any Warranties, CarePacks or Support Agreements is as simple as clicking on the correct link and following the instructions. If you have many existing systems linking them via the batch tool will most likely be preferable as opposed to linking them individually. The process for linking any of the 3 options is the same, you enter in the SAID (Support Agreement ID) number, CarePack or Warranty serial number and select the ownership type of single or multiple. Single ownership means that you have control over the warranty and have to set up any warranty shares, and you will have to add others to the share. Multiple ownership means that anyone can link to the warranty as equal owners, and thus they can set up and manage shares. Linking a CarePack or Warranty also provides access to other fields when linking. You will be able to select the Country or Region of purchase and be able to assign a nickname to the linked equipment, like the host name of the device so it is easily discernible to everyone in the company. 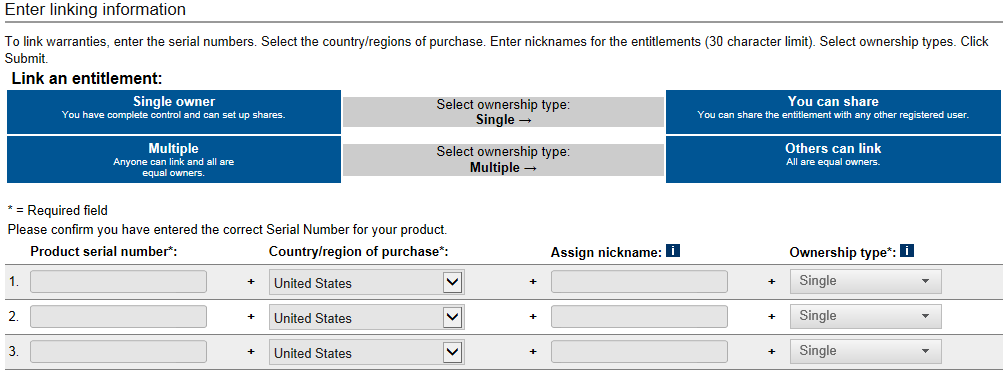
Once a you have linked your equipment you will be able to set up shares. Shares will enable everyone within your company to have the access they need to the linked equipment without everyone having to individually link it. You can set up as many shares as you want and provide each share a unique name. To do this click on the “Manage contact & warranty shares” from the main Contracts and Warranties page. 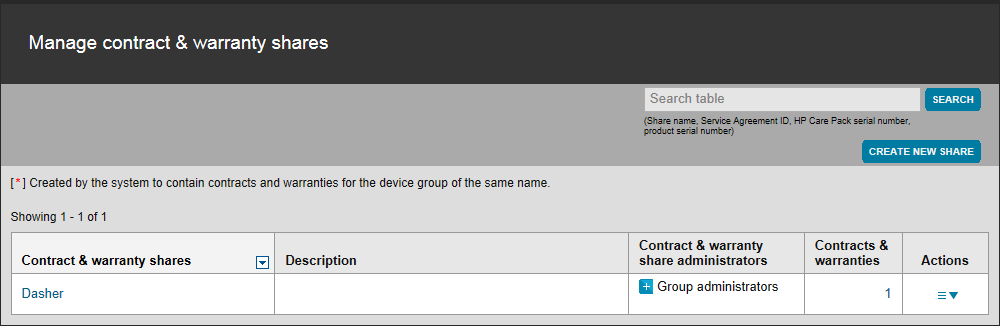
Click on the “Create New Share” button in order to create a share. The nickname, serial number and product number of the equipment will show up for you to select to your shares. Once you have added everything you want to that share click the “Next” button at the bottom of the screen. 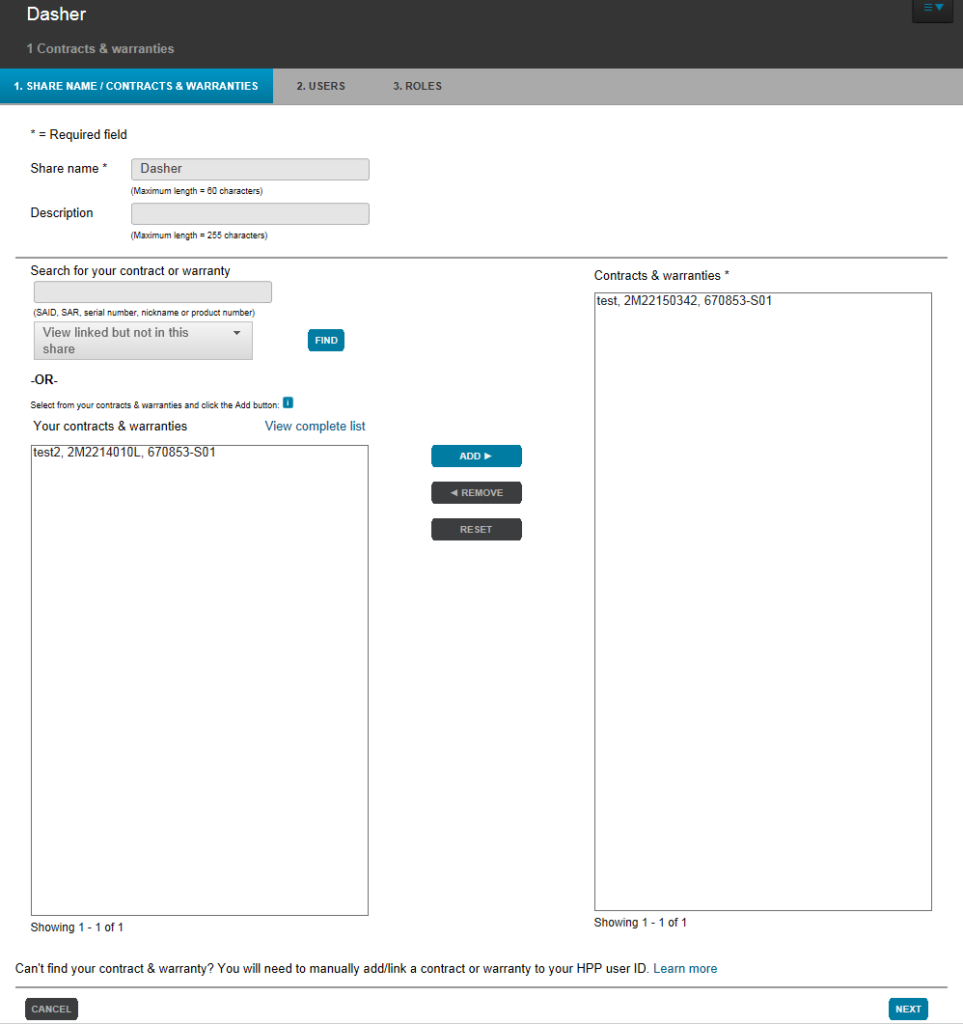
Next you can add different user groups to the share you have just created, and you will be able to assign different people group administrator rights. To create a User Group click on the “create new user group” at the top of the screen. 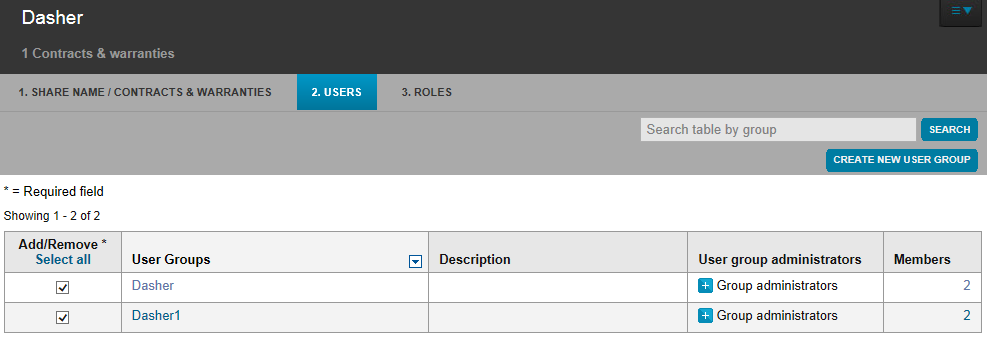
To add people to the user group you will just need the email address they used to register for their Passport account. Once you have added everyone you want to the user group click submit and you will be able to select which user groups you want to add to the share. You can even add non-employees, like your friends at Dasher to help you manage your support agreements, contracts, etc. Let us know if you would like us to help with this. Below we show an example of using the support email alias at Dasher. 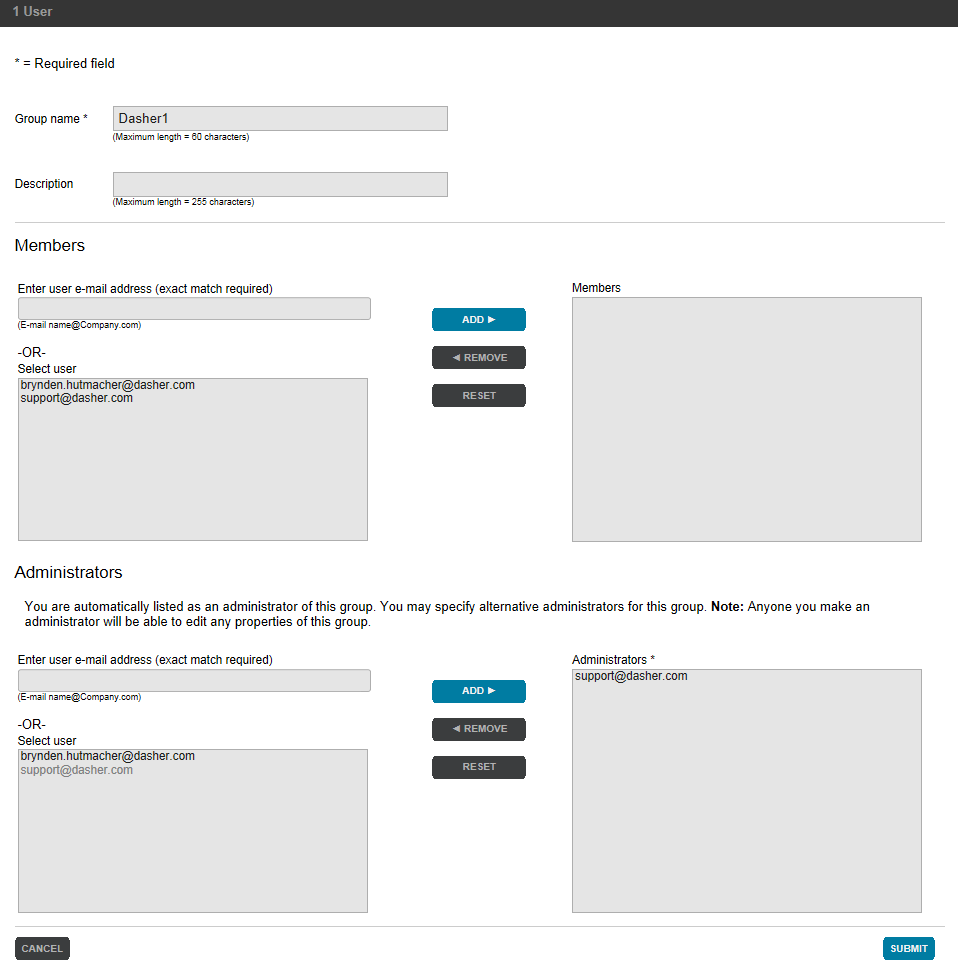
Now you will be able to add roles to each user group assigned to your share. 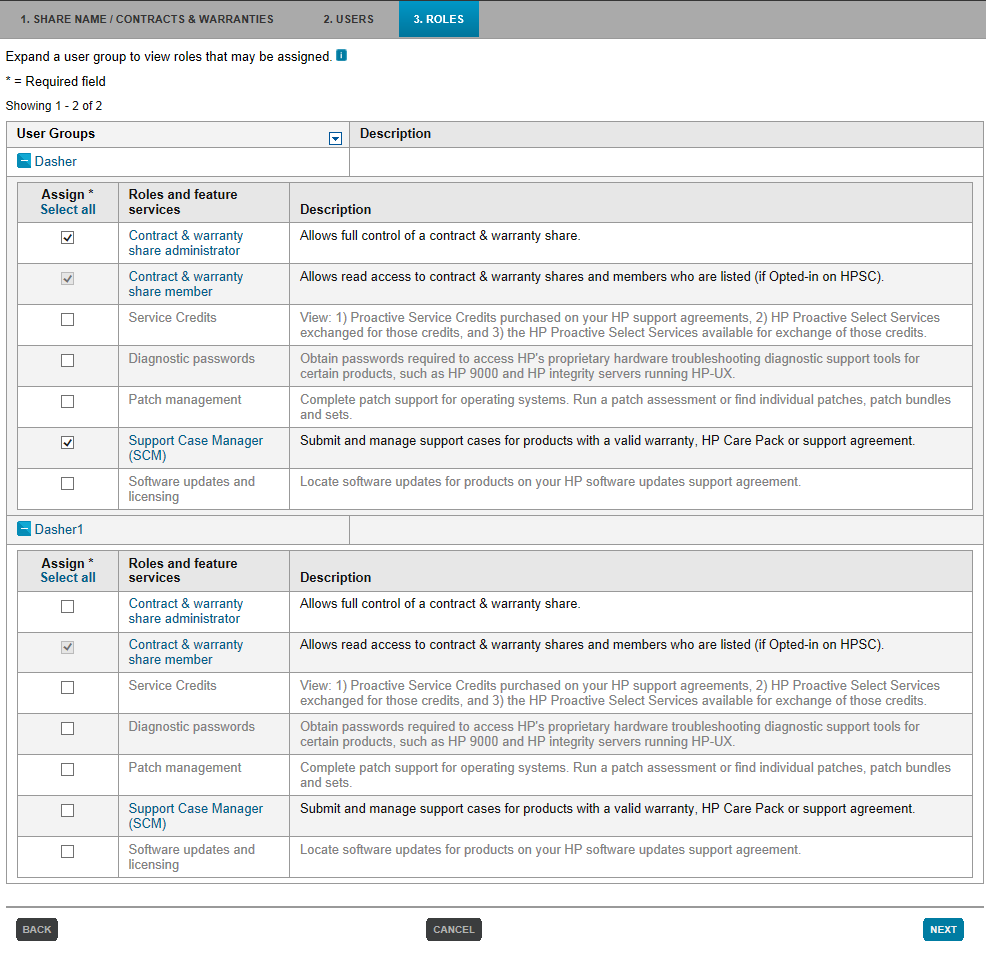
Once you have selected the appropriate roles for each user group click next and you see a summary screen before you finish the share so you can go back and make any changes that you need to. You can also go back into the share to make changes at a later date.
This process will allow anyone within your organization to have the access they need to HP firmware, OS Patches and Software updates moving forward.
Sources:
HP Support
HP CarePack